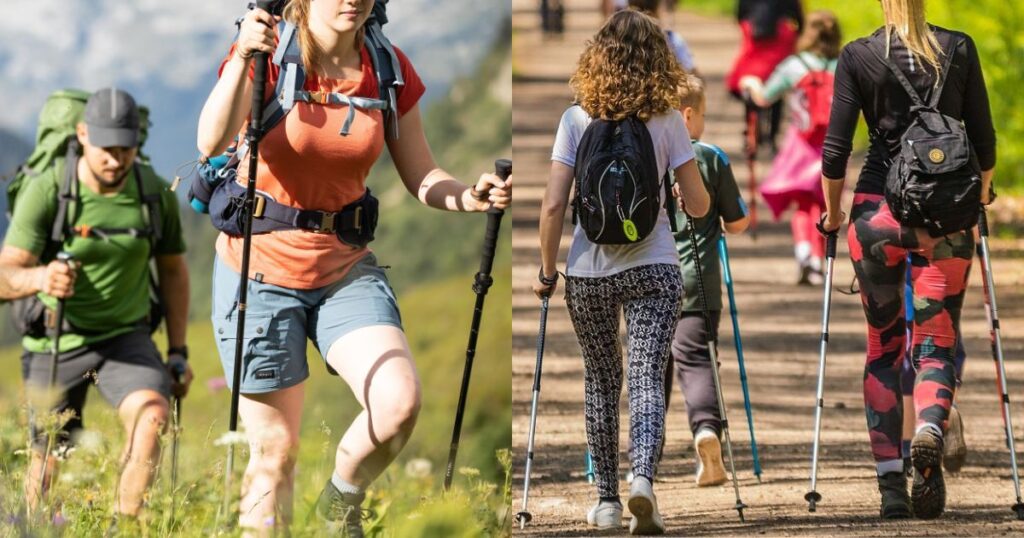
Walking sticks, must-have tools for nature lovers, play a vital role in giving you stability and support during hikes. These light and adjustable devices are crafted to improve your hiking experience by lessening the strain on your joints, boosting balance, and helping you navigate challenging landscapes.
Picture confidently tackling steep climbs and maneuvering through uneven paths. Often underestimated, walking sticks become your trustworthy companions on the journey, ensuring a safer and more enjoyable adventure. In this guide, we will delve into the art of using walking sticks effectively, revealing the tips to maximize their advantages and enhance your hiking skills.
Whether you are an experienced hiker or a beginner exploring the great outdoors, mastering the proper use of walking sticks can significantly improve your trekking experience. Learn the essentials of adjusting stick length, maintaining the correct posture, and coordinating your movements to effortlessly conquer various terrains. Embrace the simplicity and effectiveness of walking sticks, turning your hiking excursions into a more comfortable and enjoyable pursuit.
How to Use Trekking Poles
trekking poles can greatly improve your hiking adventure. To use them effectively, start by adjusting the pole’s length to match your height. Getting the sizing right ensures optimal support and balance while on the trail. Hold the handle securely, and place the poles at an angle with each step to enhance stability and ease strain on your knees and joints.
Keep a steady rhythm, syncing pole placement with your stride. Additionally, employ trekking poles to assess uncertain terrain for stability before putting your full weight on it. When going uphill, slightly shorten the poles for better leverage. Engage your upper body muscles by pushing down on the poles with each step.
On downhill sections, lengthen the poles to provide extra support and minimize impact on your knees. Always maintain a relaxed grip to prevent hand fatigue on longer hikes. To sum it up, using trekking poles correctly involves adjusting the length, maintaining a rhythmic placement, and adapting to different terrains for a safer and more enjoyable hiking experience.
Also Read: Can You Bring Hiking Poles On A Plane?
Why Use Trekking Poles.
Trekking poles bring numerous benefits to your outdoor adventures. Firstly, they provide extra stability, reducing the risk of slips and falls on uneven terrain. By distributing weight across four points, they ease the strain on your lower body, particularly your knees and joints. Additionally, trekking poles enhance balance, which is crucial for navigating challenging landscapes.
These versatile tools also help maintain a steady pace and rhythm while hiking. The engagement of your upper body muscles offers a more comprehensive workout, making trekking poles an excellent fitness aid. Moreover, they can be valuable for exploring unknown or potentially unstable terrain, ensuring safer passage. In summary, using trekking poles contributes to enhanced stability, reduced physical strain, improved balance, and an overall safer and more enjoyable outdoor experience.
Use Proper Arm Motion
Proper arm motion is essential for getting the most out of your trekking poles. Maintain a relaxed grip on the handles, allowing for smooth and fluid movement. Actively engage your arms, swinging them naturally in sync with your steps.
Avoid holding the poles too tightly to prevent hand fatigue; a light grip is key. Keep your arms close to your body for efficient and comfortable movement. Use a pendulum-like motion, swinging the poles forward and backward to maintain balance. By incorporating correct arm motion, you amplify the advantages of trekking poles, ensuring a more seamless and enjoyable hiking experience.
Plant the Pole
Properly placing the pole is crucial for getting the most out of its benefits. Begin by firmly positioning the tip of the pole on the ground with each step. This action provides stability and assists in balance, especially on uneven surfaces. Ensure a natural and rhythmic planting motion as you move forward.
Keep a steady and comfortable grip on the handle while planting the pole. Avoid using forceful or abrupt movements; instead, let the pole seamlessly extend with your arm’s natural motion. By mastering the technique of planting the pole, you’ll enjoy improved stability, minimized impact on joints, and an overall more efficient trekking experience.
When to Use a Double Pole Switch
A double-pole switch is typically used when a device or circuit needs both the hot and neutral wires to be simultaneously interrupted. These switches find common applications in controlling large appliances such as water heaters, electric ovens, or air conditioning units. They play a vital role in dealing with 240-volt circuits by enabling the complete disconnection of power.
In residential settings, double-pole switches are frequently used in kitchens, laundry rooms, or for heavy-duty electrical devices. It is essential to opt for a double-pole switch when local electrical codes or safety considerations require the disconnection of both hot wires for a specific circuit. If you are unsure about the appropriate use of a double-pole switch in your particular electrical setup, it’s advisable to consult with a qualified electrician.
How to Use Poles on Hills
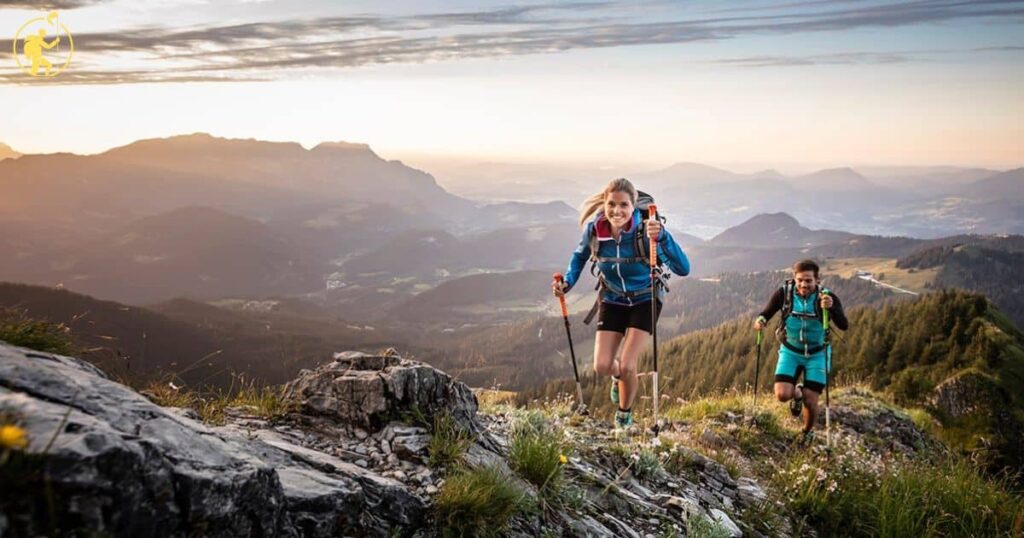
When tackling hills with trekking poles, it’s crucial to adjust their length for optimal support. Shorten the poles slightly when going uphill to improve leverage and help maintain balance. Engage your upper body muscles by pressing down on the poles with each step, assisting your ascent and reducing strain on your legs.
On downhill slopes, lengthen the poles to provide extra stability and minimize impact on your knees. Place the poles in front of you for a controlled descent. Focus on maintaining a steady rhythm, coordinating pole placement with your steps to ensure a smooth and secure descent. Adjusting the length and using your trekking poles strategically on hills enhances stability, reduces fatigue, and makes your hiking experience safer and more enjoyable.
How to Use Poles on Stairs
Using trekking poles on stairs can offer added stability and support during your ascent or descent. Start by adjusting the length of the poles to a comfortable height. When ascending stairs, firmly plant the poles on each step to evenly distribute your weight. Use a rhythmic motion, coordinating the placement of the poles with your steps to enhance balance and reduce strain on your legs.
While descending stairs, adjust the length of the poles for additional support. Plant the poles on each step to help control your descent and minimize the impact on your knees. Keep a relaxed grip on the handles, allowing for a natural and fluid motion.
Whether ascending or descending, utilizing trekking poles on stairs can enhance stability, lessen the load on your lower body, and make navigating steps more comfortable and secure.
How to Adjust Your Trekking Poles
- Height Check:
Adjust the trekking poles to match your height for optimal support.
- Locking Security:
Ensure the locking mechanism is securely in place after adjusting the pole length.
- Terrain Adaptation:
Modify pole length based on the terrain—shorter for uphill climbs, longer for downhill descents.
- Comfortable Grip Position:
Set the pole grip at a height that feels comfortable for your hands.
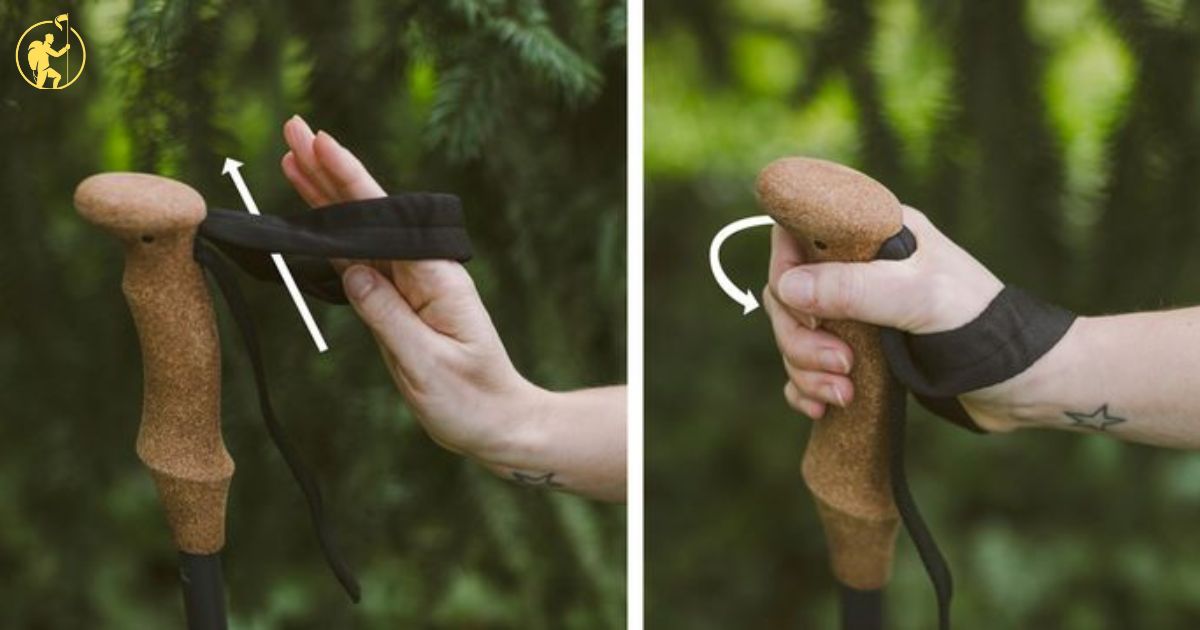
- Wrist Strap Adjustment:
Adjust wrist straps for a snug fit, providing better control during your hike.
- Trial and Adjustment:
Experiment with different adjustments to find what suits your hiking style best.
- Regular Check-In
Periodically inspect and readjust poles during extended hikes to maintain comfort.
How to Make Adjustments
- Component Identification:
Familiarize yourself with the various parts of the equipment.
- Pole Length Adjustment:
Modify the pole length to match your height and the characteristics of the terrain.
- Locking Mechanism Verification:
Ensure the locking mechanism is securely fastened after any adjustments.
- Comfortable Grip Position:
Set the grip at a height that feels comfortable for your hands.
- Wrist Strap Customization:
Adjust the wrist straps to achieve a snug and secure fit.
- Experimentation for Comfort:
Experiment with different adjustments to discover the most comfortable settings.
- Regular Maintenance Checks:
Periodically inspect and readjust components to maintain optimal performance.
Trekking Poles vs. Nordic Walking Poles
| Feature | Trekking Poles | Nordic Walking Poles |
| Primary Use | Hiking and Backpacking | Fitness Walking |
| Shaft Material | Aluminum or Carbon Fiber | Aluminum or Composite |
| Grip Design | Ergonomic, for varied terrain | Designed for walking posture |
| Tip Design | Tungsten Carbide for grip on trails | Rubber tips for pavement |
| Wrist Straps | Adjustable, for support | Fixed, for consistent grip |
| Basket Size | Larger, suitable for diverse terrain | Smaller, optimized for sidewalks |
| Shock Absorption | Common feature for impact reduction | Rare, more rigid design |
| Collapsible Design | Often collapsible for easy storage | May or may not be collapsible |
| Target Audience | Hikers and outdoor enthusiasts | Fitness and wellness walkers |
This breakdown highlights the key differences between trekking poles and Nordic walking poles based on their various features and intended uses.
Pole Walking For Seniors
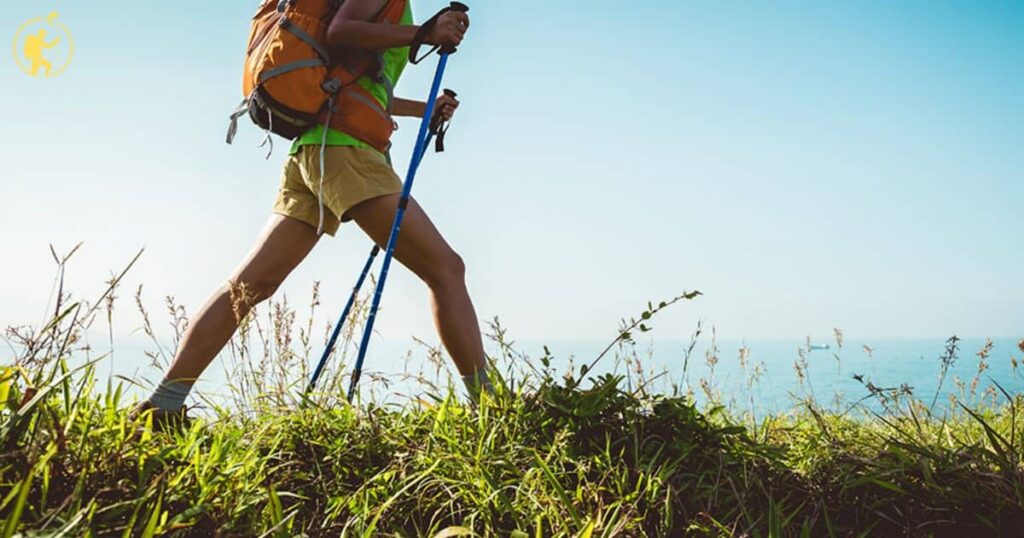
Pole walking is an excellent exercise choice for seniors. Using specially designed walking poles offers additional stability and support, lowering the risk of falls and enhancing balance during walks. This low-impact activity engages upper body muscles, promoting cardiovascular health, and contributing to overall well-being.
Seniors can experience the advantages of pole walking at their own comfortable pace. It is an accessible and enjoyable way to stay active, preserve mobility, and nurture a sense of independence. The ease of incorporating poles into a regular walking routine makes this exercise suitable for seniors of diverse fitness levels, encouraging a healthier and more active lifestyle.
How to Use Walking Sticks For Senior
- Choosing the Right Stick:
Select a walking stick with a comfortable grip and appropriate height.
- Height Adjustment:
Adjust the stick’s height to align with your wrist when standing.
- Wrist Strap Utilization:
Use the wrist strap to maintain a secure grip during walks.
- Maintaining Upright Posture:
Walk with a straight posture, utilizing the stick for balance.
- Pacing and Rhythm:
Establish a steady walking rhythm, coordinating stick placement with steps.
- Testing Stability:
Probe uncertain terrain with the stick to ensure stability.
- Regular Inspection:
Check the stick regularly for signs of wear and make adjustments as needed.
How to Use Hiking Poles Uphill
When ascending uphill with hiking poles, prioritize a secure grip. Adjust the pole length to optimize uphill leverage, providing enhanced stability and support. Engage your upper body by pressing down on the poles with each step, thereby reducing strain on your lower limbs.
Maintain a rhythmic motion, coordinating pole placement with your steps. Slightly shortening the poles can offer better advantage during uphill climbs. This technique, combined with a relaxed grip and a consistent pace, maximizes the benefits of hiking poles, making uphill treks more manageable and enjoyable.
Trekking Pole Height Chart
Here is a general guideline for adjusting trekking pole height based on your height:
- Under 5’4″ (163 cm): Set poles to around 100-110 cm.
- 5’4″ to 5’8″ (163-173 cm): Adjust poles to approximately 110-120 cm.
- 5’9″ to 6’2″ (175-188 cm): Optimal height is around 120-135 cm.
- Over 6’2″ (188 cm and above): Set poles to about 135 cm or more.
Keep in mind that these measurements are approximate, and personal comfort and the type of terrain should also be considered when adjusting trekking pole height. Adjustments may be necessary based on individual preferences and specific hiking conditions.
How to Use Walking Sticks For Balance
Using walking sticks for balance is a helpful technique, especially for seniors or those with stability concerns. Follow these steps:
1. Choose the Right Walking Sticks:
Select walking sticks with comfortable grips and adjustable height settings.
2. Proper Height Adjustment:
Set the stick height so that your elbow is slightly bent when holding the grip.
3. Secure Wrist Straps:
Wear the wrist straps and adjust them for a snug fit to maintain a secure hold.
4. Hold Sticks Comfortably:
Grasp the handles of the walking sticks with a relaxed and comfortable grip.
5. Use Both Sticks:
Employ both sticks for better balance; plant them alternately with each step.
6. Maintain Upright Posture:
Walk with an upright posture, engaging your core muscles for added stability.
7. Test the Terrain:
Use the walking sticks to probe uncertain or uneven terrain before stepping.
8. Practice Steady Rhythm:
Establish a steady walking rhythm, coordinating stick placement with your steps.
9. Regular Inspection:
Periodically check the condition of the sticks and adjust as needed for optimal balance support.
By following these steps, you can effectively use walking sticks to enhance your balance and stability during walks or hikes.
FAQ’s
How do you use hiking poles for beginners?
Adjust poles, grip lightly, sync with steps for beginner hiking stability.
What is the correct technique for trekking poles?
Correct trekking pole technique involves adjusting length, gripping firmly, and syncing with stride for stability and balance.
What is the proper way to walk with walking poles?
Adjust poles, grip comfortably, walk upright, sync steps for proper walking pole use.
Conclusion
In conclusion, mastering the use of hiking poles significantly improves stability, balance, and overall hiking experience. When navigating various terrains, pay attention to the rhythmic placement and the angle at which your poles are planted, while also considering the benefits of adjusting their length.
Envision the enhanced posture and decreased strain on your joints, transforming each hike into a more enjoyable experience. Reflect on the potential moments of increased confidence and comfort that await on the trails. The simplicity of incorporating trekking poles into your outdoor activities might just be the key to unlocking a more fulfilling and safer adventure.

J.K. Rolowing, an avid hiking enthusiast with 8 years of experience, blends passion and nature in captivating tales. Embracing the trail, weaving adventures through words.